A few problems I had was again with photoshop as I still am not 100% with all the funtions but with alot fo time and patients I got on with it and got it done, another part of the project I found harder was attaching the ear to the side of the head, with the ammount of polygons on the ear compared to attach points on the sides of the head made this part of the project tough, so if I had time I would of re-made my ear with this in mind.
I was very happy with how my model turned out, if I had a few more days to tweak the model some more I would go back and change the eye sockets and make them a little bit bigger and increase the size of my neck.
Overall the experiance was good, I enjoyed learning new skills and would very much like to make something like this again in the near future.
Thursday, October 21, 2010
Animation
I decided to do some basic animation of making the head smile, open its mouth and wink, here are the images of this and the three heads used.
 Here is my model smiling

Here is my model with its mouth open
 Here is my model winking
 Here are all three heads used to make the basic animations.
 Here is my model smiling
Here is my model with its mouth open
 Here is my model winking
 Here are all three heads used to make the basic animations.
Final image
The head model has now been completed and I am happy with the model, I found this project very enjoyable and would like to further increase my skills I have gained from creating this model.
Here is the finished model of my head from the front side and back.
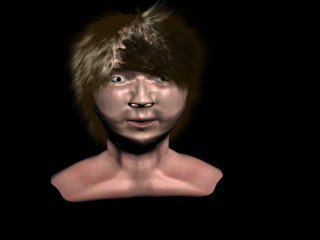
Here you can see the front of my head, the hair flows in a similar way my own hair down with a small parting on the left side of the forehead.
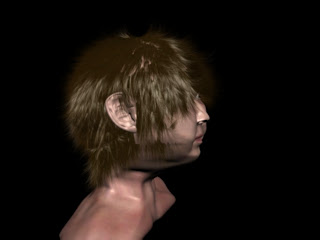
Here is the side view of my head, I liked this picture because it almost showed excactly what my ear looks like with the hair hanging over the top.
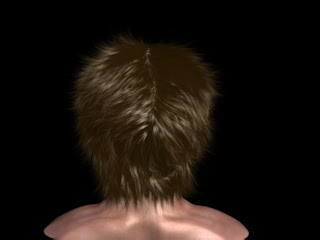 I was very happy with the image of the back of my head s it shows a near identical hair parting to my own hair.
The Hair
I was very pleased with how my head had turned out, all that I had to do now was use a brand new tool for me, The "Hair and Fur" modifier.
This can be found in the modify options, but before I get there I first had to select all the polygons that I would use to apply hair to, once all the polygons had been selected I held down shift and dragged them upwards along the Y axis, I then re saved this as a separate file then merged my head and hair parts back together, now I could apply the modifier.
Here is the "skull cap" with and without hair applied.
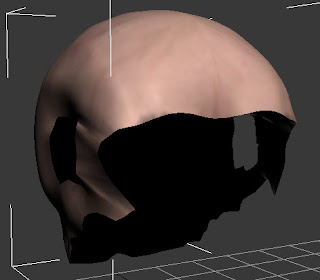
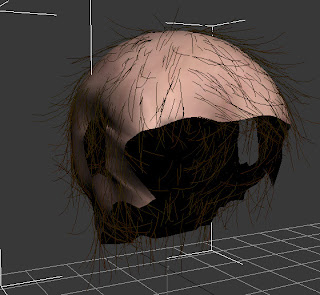 These brown lines are to indicate which polygons the hair will grow from.
To modify the hair I had to select the drop down menu for Hair and Fur and select guide, this allowed my to customize almost every aspect of the hair, how big the hair grew, the direction, if it was brushed or puffed up, using these different tools I managed to get a nice hair flow to mimic my own hair.
Here is what the hair looks like with guide applied.
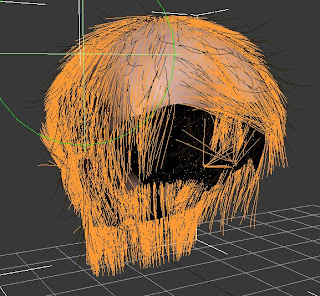
These orange lines show the direction which the hair will grow in and the approximate size they will be, this was very useful for me as I have long hair, the green circle you see is the brush tool which allowed me to brush stray hairs back into position and position the hair into a nice shape.
Almost done
With the skin complete I was almost finished modelling my head, all I had to do now was add the hair which I mentioned earlier.
But before that here is a quick render of the face at its completed stage.

But before that here is a quick render of the face at its completed stage.

Improving the skin Continued
Now that I was happy with how the skin as coming along I decided to tweak some more with the bump map that I created earlier and was very happy with how my skin texture turned out.
With this close up of my cheek you can see how the skin looks bumpy with small pores to make it look like its not smooth like before .
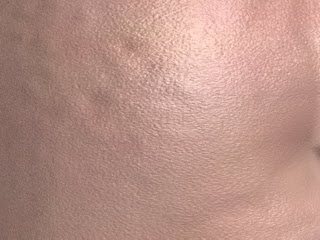
With this close up of my cheek you can see how the skin looks bumpy with small pores to make it look like its not smooth like before .

Improving the skin
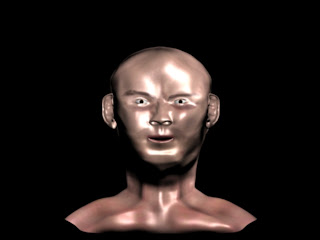
Now that the skin has been added to my model it was time to make it more realistic looking, this would be done by mixing two maps together and adding a specular map to make the face look more oily in areas such as the forehead, eyes and chin, the focus was areas of the face that humans touch most.
This was done by going back to photoshop and creating a specular map with the face map behind it, I would then desaturate the image and proceed to remove the edges of the picture, once this was done I then drew white lines onto the areas that would shine the most on my face, once this was down a gaussian blur was added that would blur the picture as not to make the shines to bright.
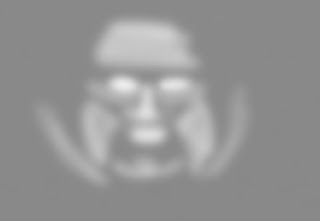 This would then be added into 3DS max and added to the material already with the skin atached onto the "Specular map", this would give my face a glow to show were oily parts are.
Here is a render of the oil applied, I was a bit bright in this image but with a few tweaks the final image looks alot more realistic.

Subscribe to:
Comments (Atom)